If you use SharePoint


These fields often contain several values that you want to display clearly in a Power Apps
A very useful function for this is Concat().
In this article, I will show you how you can use this function to display the selection values in a clear and clean list.
The challenge
By default, Power Apps
So if you have a multi-select selection field, you want to display the individual values as text and separate them cleanly to ensure better readability.
The solution: Concat function
With the function Concat() you can display the individual values from a multi-select field in a user-friendly form.
It allows you to combine the values and display them with a separator of your choice.
Let’s take the “Usage” field as an example, in which several entries can be selected.
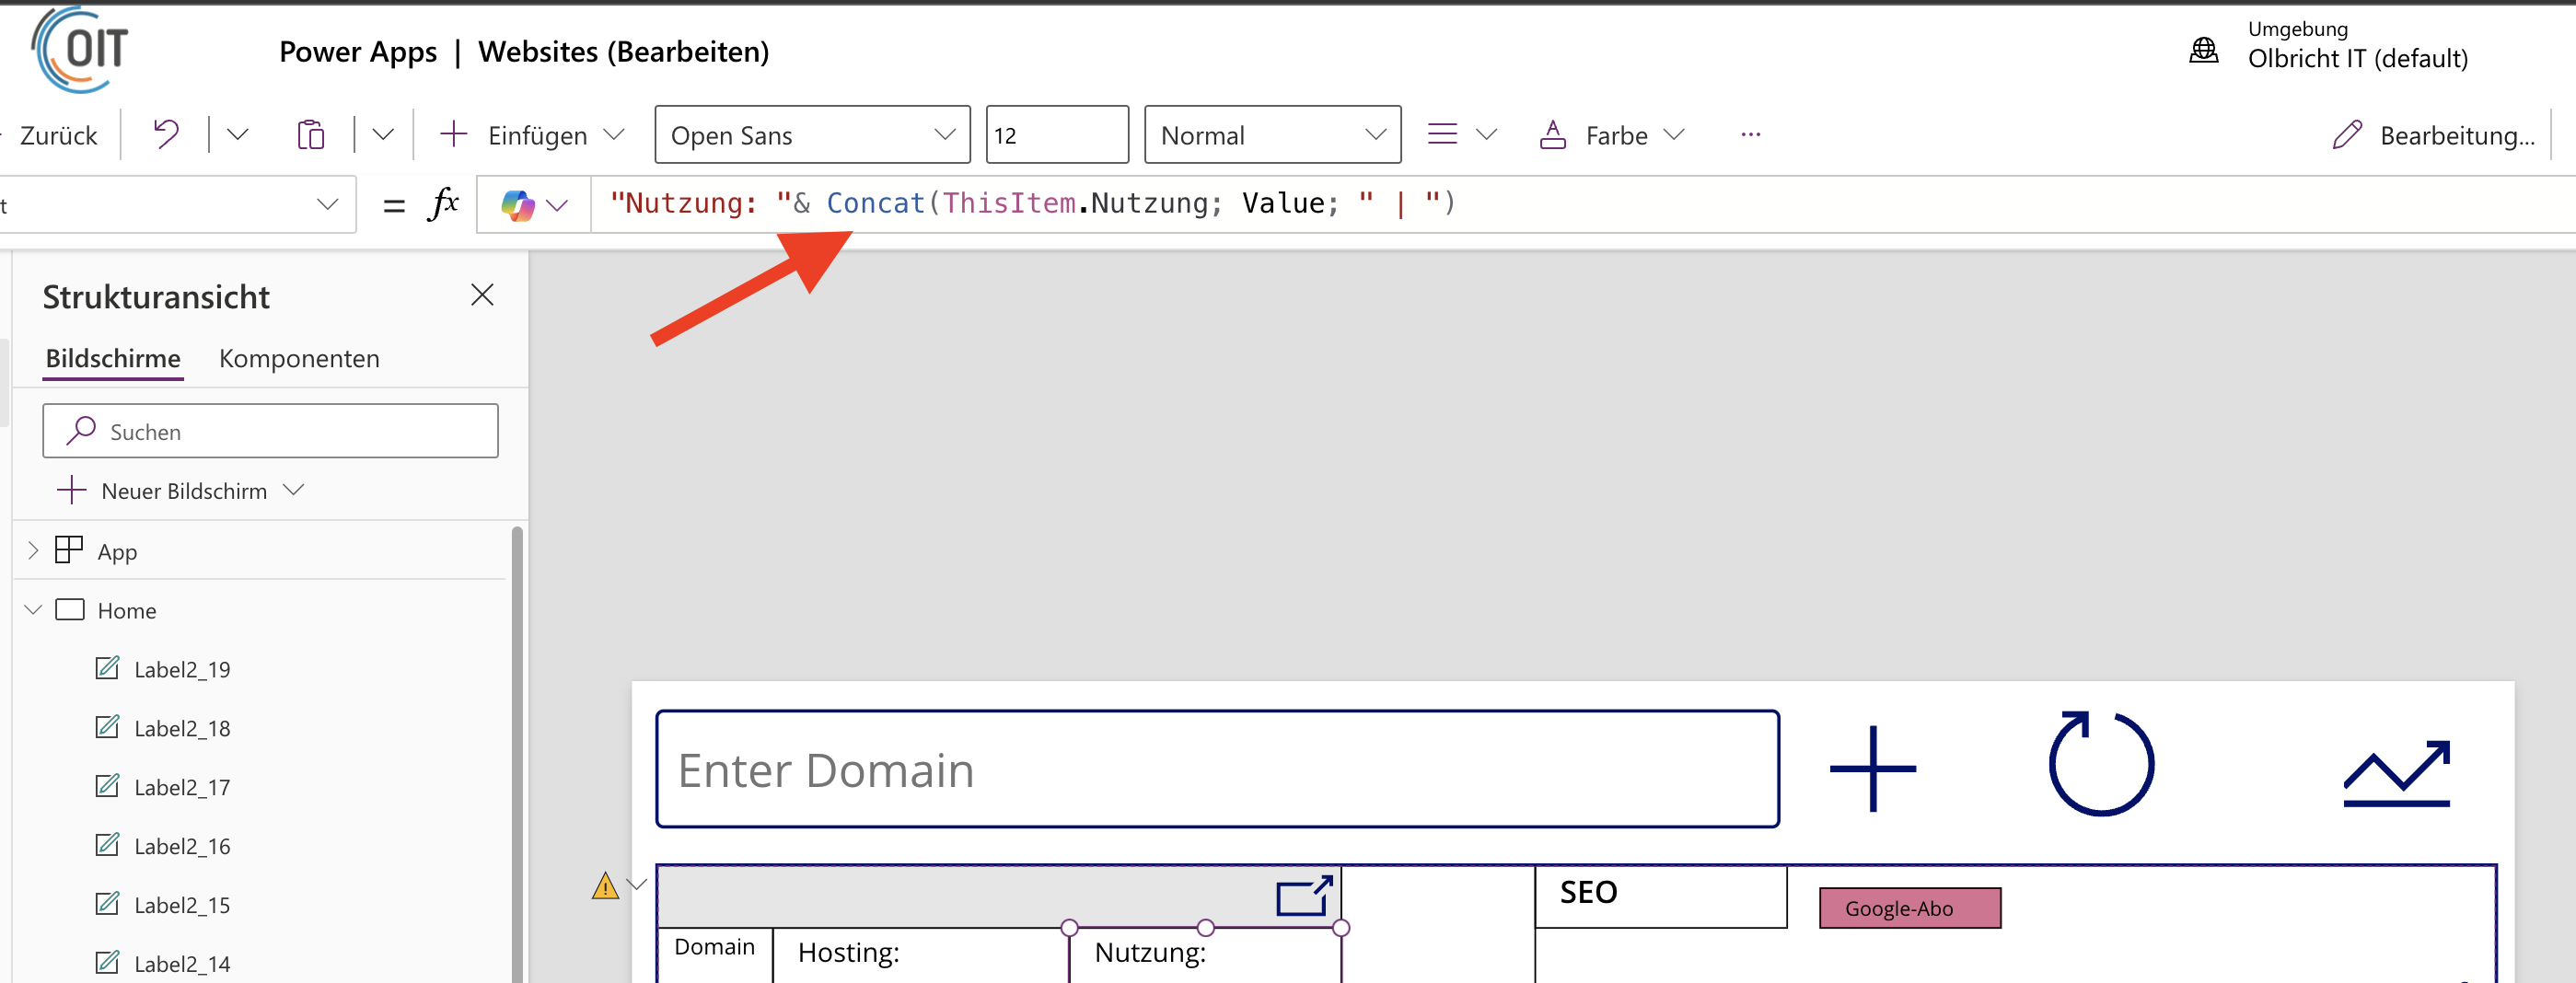
You can use the following formula to display the selected values:
Concat(ThisItem.Nutzung; Value; " | ")Explanation of the formula:
- ThisItem.usage: Refers to the multi-select field “Usage” from SharePoint

- Value: Accesses the actual values (the selected options).
- ” | “: This is the separator that you want to use to separate the different values from each other.
Here we use a “|” (pipe symbol).
However, you can also use any other character or word, such as a comma or a semicolon.
How to implement it in Power Apps:
- Select the label or text field in which you want to display the values.
- Enter the
Concat()function shown above in the text properties field. - Done! Now all values from the multi-select field “Usage” are listed neatly with your desired separator.
Possible applications
- You can use this method not only for multi-select selection fields, but also for other fields in which several values are stored.
- Change the separator to match the design of your app.
A comma or a new line might fit better in some cases.
With this simple formula, you can ensure that the data from your SharePoint

If you have any questions about Power Apps
We will be happy to provide you with advice and assistance and help you with any problem.
You can reach us at any time at [email protected].
Good luck with your implementation!
Dieser Beitrag ist auch verfügbar auf:
![]() Deutsch (German)
Deutsch (German)

