The WordPress
The rights to the plugin were acquired by “wpo365.com”, apparently with the aim of attracting existing users to their own plugin called “WPO365 Microsoft Graph Mailer“.
If you check your settings regularly, you may have noticed this banner in the plugin settings:

But no need to panic! We’ll show you how to migrate quickly and easily!
These instructions are also suitable for a new installation,
Installation of the plugin
There are several ways to install the successor plugin. You can either install this via the normal WordPress

As soon as the plugin is installed and activated, go to “WPO365” in the sidebar and you will see the following:

There you activate the sending of emails via Microsoft Graph and then confirm with “Confirm”:

The plugin’s import tool will now open:
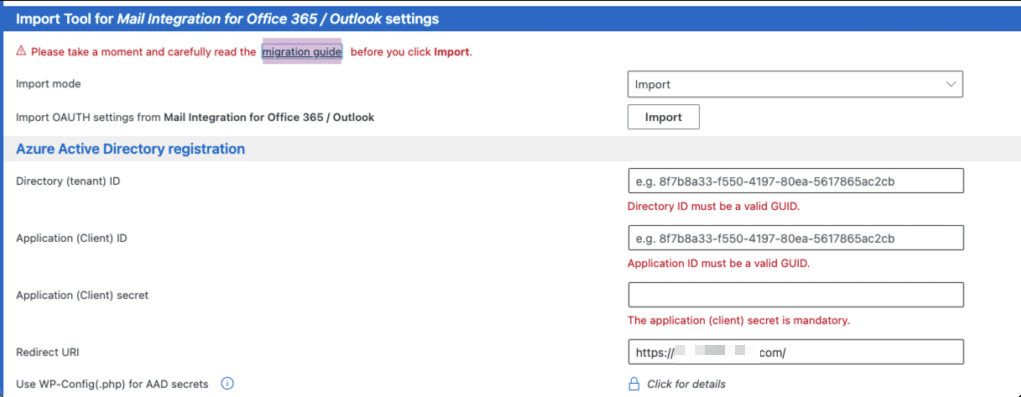
If no OAuth settings are found or it is a new installation, only the import area is missing, the rest remains unchanged.
Import from “Mail integration for Office 365 / Outlook”
Click on the “Import” button to import the existing settings from the old plugin:

As you can see, all the information from the old plugin has been transferred:

You can now skip to “Mail account configuration”.
New installation/configuration
Now go to the Azure Active Directory
In the left sidebar there is the item “App registrations”, where you create a new registration as shown in the following screenshots:

Now you have to copy the “Redirect URI” from the plugin settings:

In Azure, you must paste the name for the application and the previously copied “Redirect URI”, select “Web”
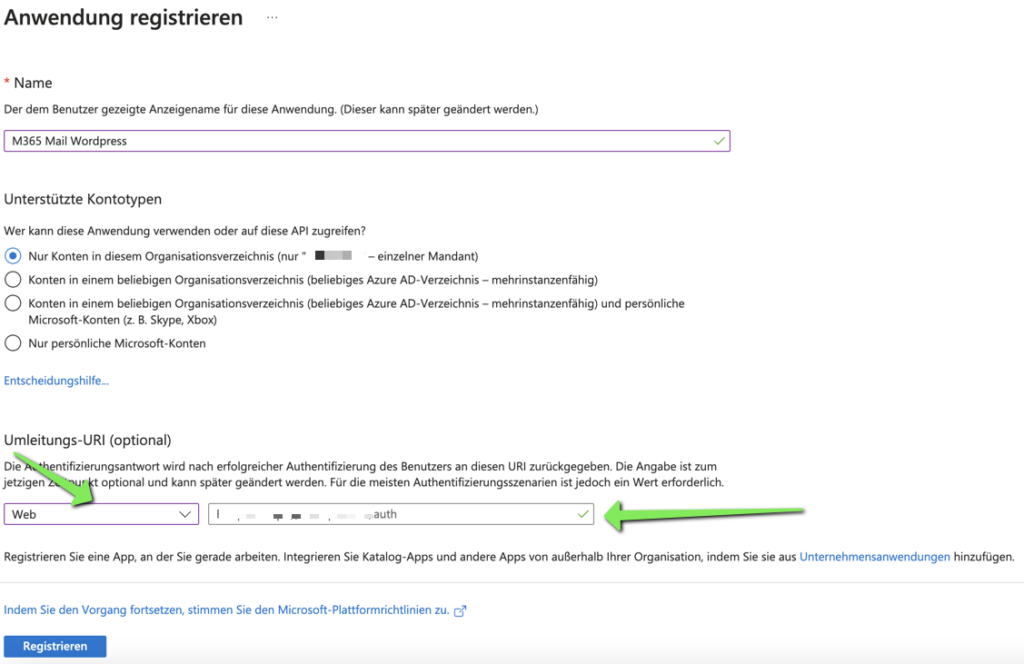
The new app registration is now complete. Create a new “Client secret” under “Certificates & Secrets”:

Copy the value of the newly created secret and then paste it into the plugin settings under point 3:

Now we navigate back to “Overview” where we find the two remaining required values:

These are now stored in the plugin settings:

Mail account configuration
In the text field, enter the address from which the mails are to be sent and then click on “Authorize”:

A window opens, here you must confirm that the account has delegated authorizations:

The M365 login window for the desired account will then open:

As soon as the link to M365 has been established, you can save the configuration and send a test email:
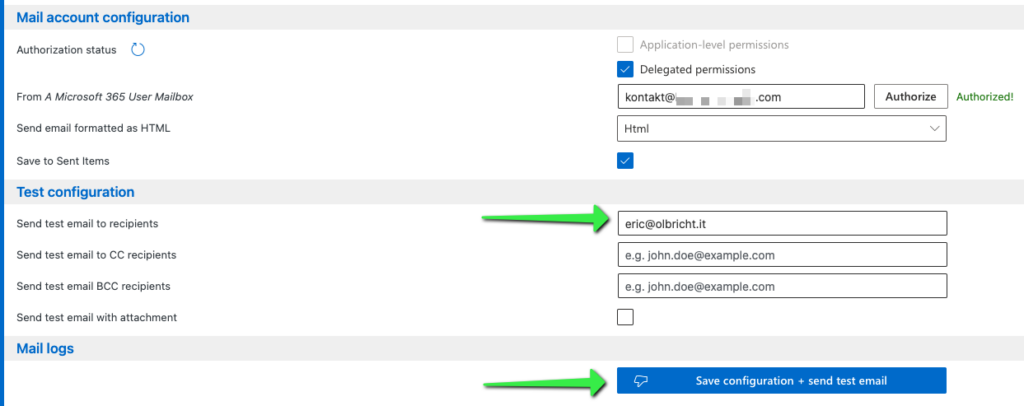
Now the installation is complete, check your mailbox to see if the test mail has arrived. If not, take a look at the “Debug Logs” to determine possible error sources.
Dieser Beitrag ist auch verfügbar auf:
![]() Deutsch (German)
Deutsch (German)


