In this article we will look at how to add a header element to the form. For convenience, we’ll add a logo to the header. You can use visual indicators, color bands, and more. Use the SharePoint
Add header
Step 1
Click on “New” and select “Configure layout”.

Step 2
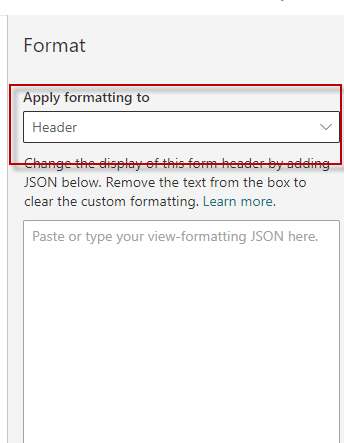
In the Format section, make sure that Apply formatting to as ‘Header’ is selected.

Step 3
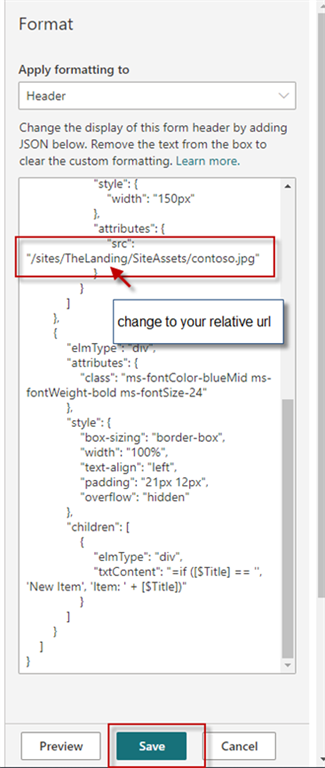
In the JSONJavaScript Object Notation is abbreviated as JSON. JSON is programming language independent and compact. We use JSON code to format SharePoint online:Show search results mehr erfahren formatting field, apply the JSONJavaScript Object Notation is abbreviated as JSON. JSON is programming language independent and compact. We use JSON code to format SharePoint online:Show search results mehr erfahren code below to add information to the header section. Here we are trying to put a logo in the header.
Notice
Be sure to change the “src” to a relative urlA Uniform Resource Locator identifies and locates a resource, for example a website, via the access method to be used and the location of the resource in computer networks. to your company logo.
{
    "debugmode": "true",
    "elmType": "div",
    "attributes": {
        "class": "ms-bgColor-white"
    },
    "style": {
        "width": "99%",
        "border-top-width": "0px",
        "border-bottom-width": "1px",
        "border-left-width": "0px",
        "border-right-width": "0px",
        "border-style": "solid",
        "margin-bottom": "16px"
    },
    "children": [
        {
            "elmType": "div",
            "style": {
                "display": "flex",
                "box-sizing": "border-box",
                "align-items": "center"
            },
            "children": [
                {
                    "elmType": "img",
                    "style": {
                        "width": "150px"
                    },
                    "attributes": {
                        "src": "RELATIVE URL TO LOGO"
                    }
                }
            ]
        },
        {
            "elmType": "div",
            "attributes": {
                "class": "ms-fontColor-blueMid ms-fontWeight-bold ms-fontSize-24"
            },
            "style": {
                "box-sizing": "border-box",
                "width": "100%",
                "text-align": "left",
                "padding": "21px 12px",
                "overflow": "hidden"
            },
            "children": [
                {
                    "elmType": "div",
                    "txtContent": "=if ([$Title] == '', 'New Item', 'Item: ' + [$Title])"
                }
            ]
        }
    ]
} 
Step 4
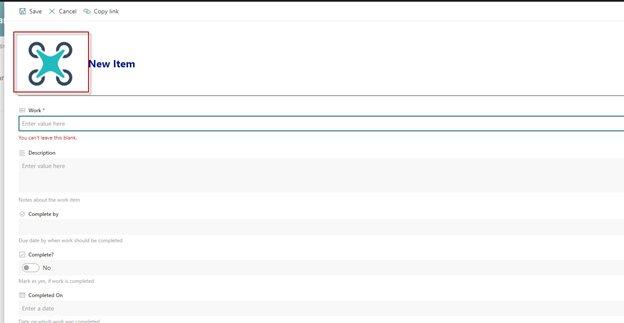
Observe the logo after the formatting is saved successfully. You may need to update your browser

Step 5
Troubleshoot if the logo does not appear. if the logo does not appear. If it still doesn’t work, observe the JSONJavaScript Object Notation is abbreviated as JSON. JSON is programming language independent and compact. We use JSON code to format SharePoint online:Show search results mehr erfahren formatting being saved and investigate any formatting issues using the developer tools. You can copy the code from the Git Hub reference in the reference section and modify the code to suit your needs.
Dieser Beitrag ist auch verfügbar auf:
![]() Deutsch (German)
Deutsch (German)

