Integration of Facebook with Power BI
To integrate Facebook data with Power BI
Prerequisites
Users need a Facebook account and a Power BI

-Facebook account
-Power BI desktop
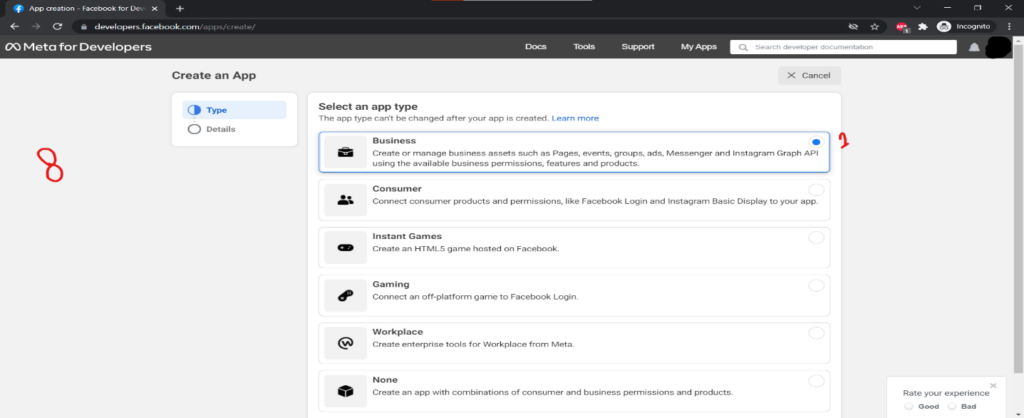
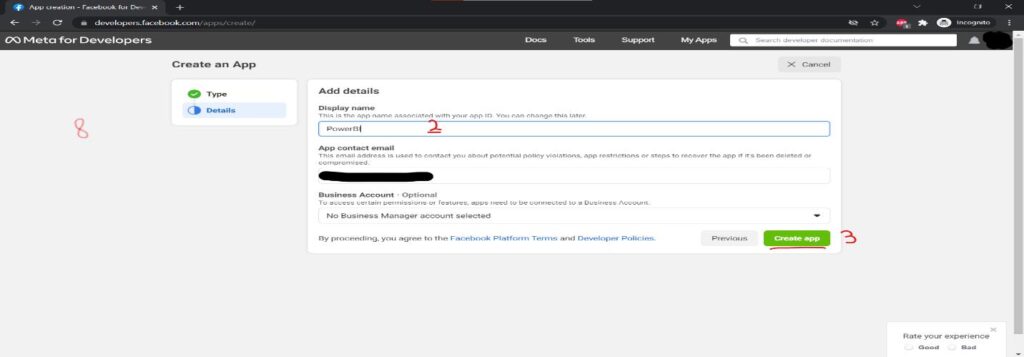
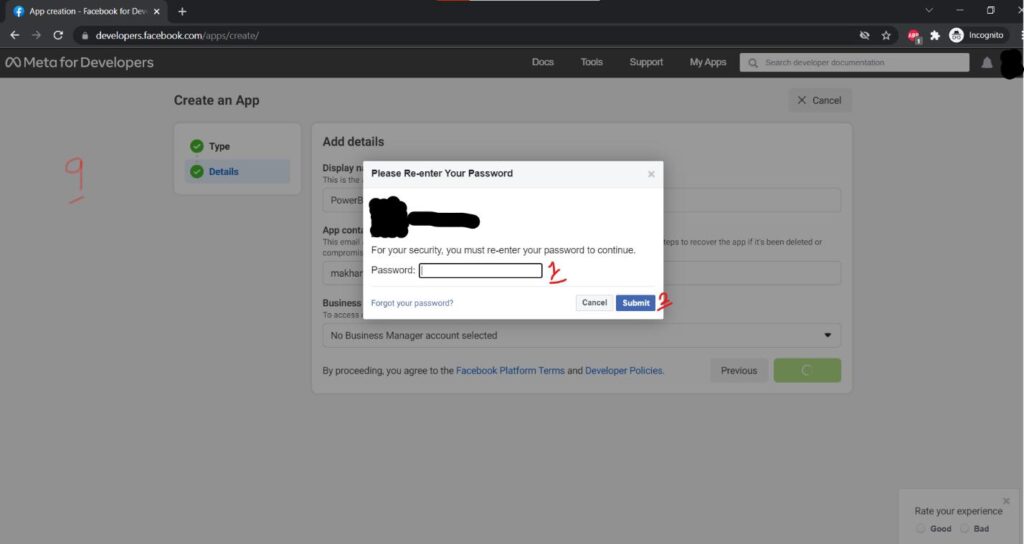
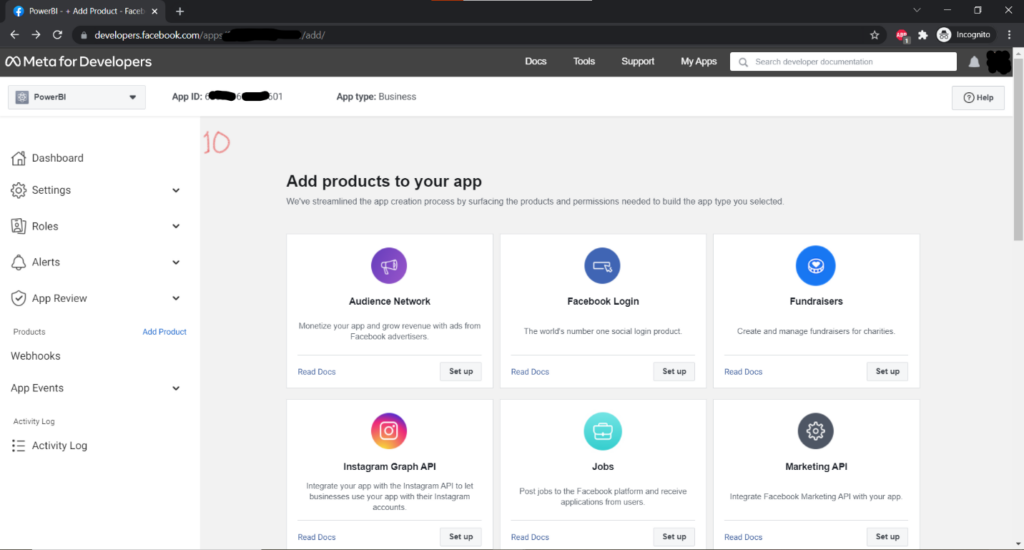
Creation of Facebook apps and disclosure of the API
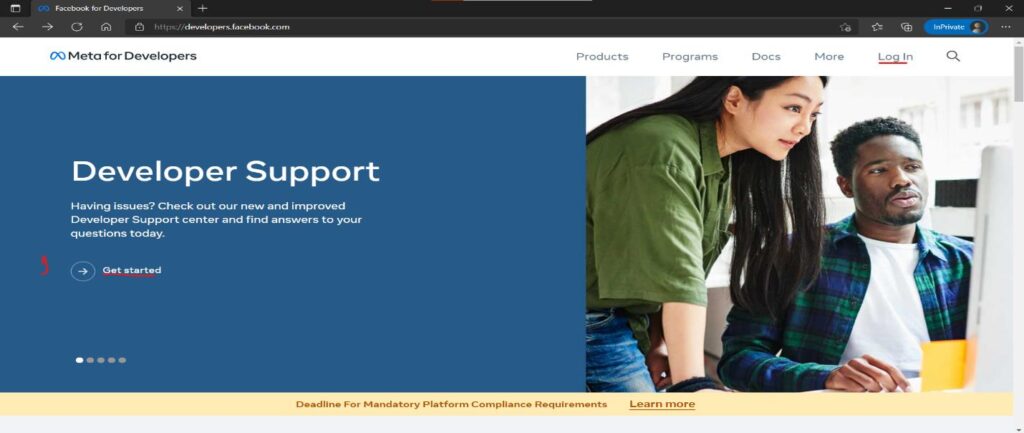
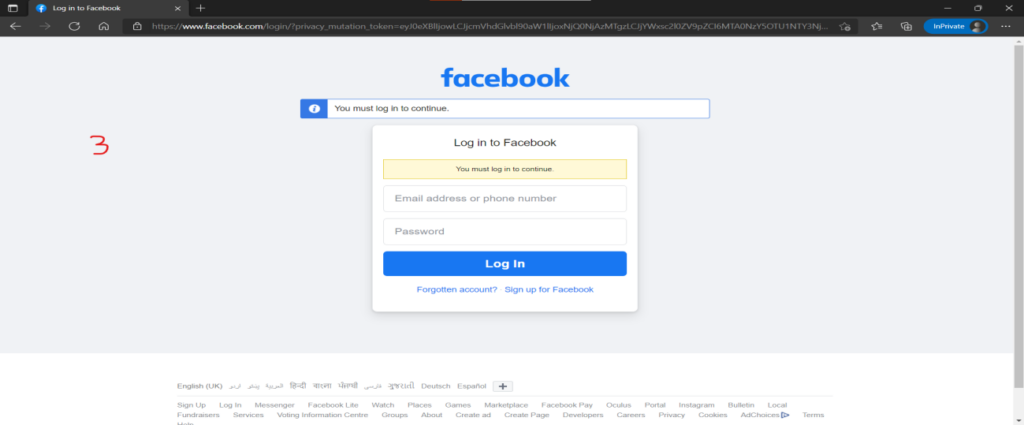
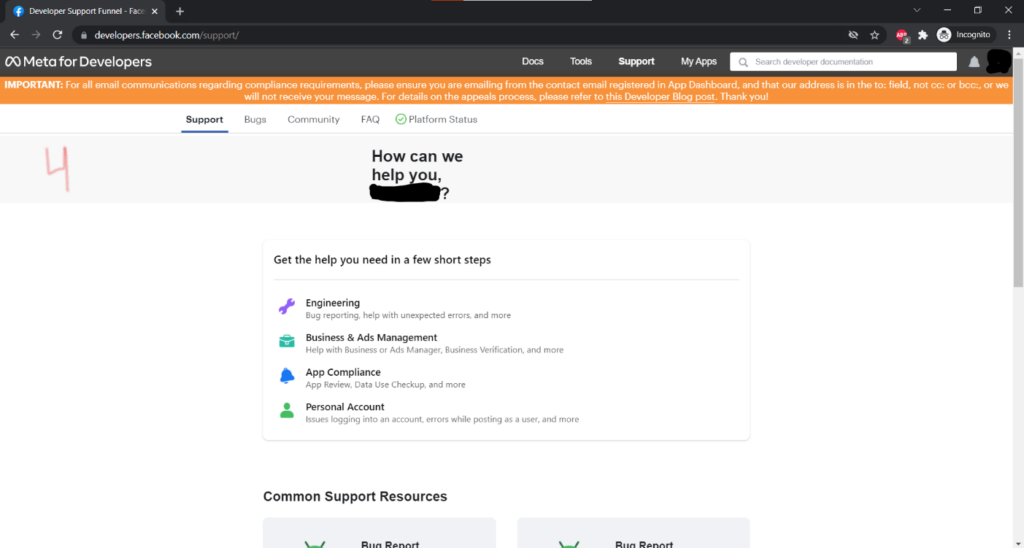
To integrate the user, the developer must log in to Facebook with user credentials. Open the Facebook for developers. After opening the link, you will be taken directly to this page, the user can log in to their account or click on “Get started”. (Recommended)
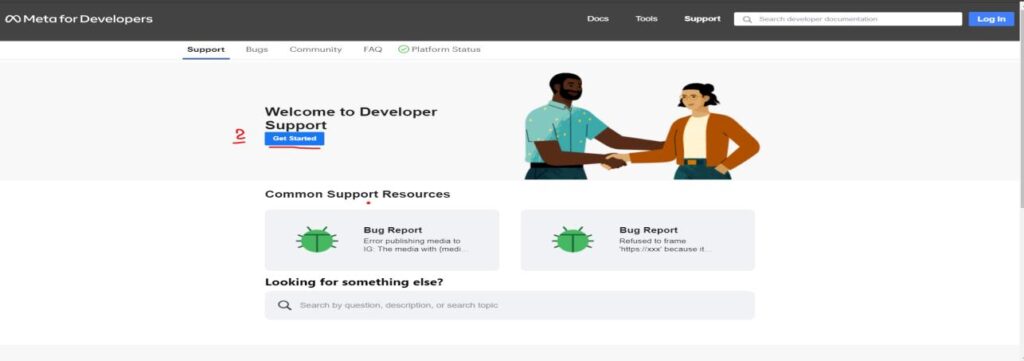
If you click on ” First steps “, the user will be redirected to the following page
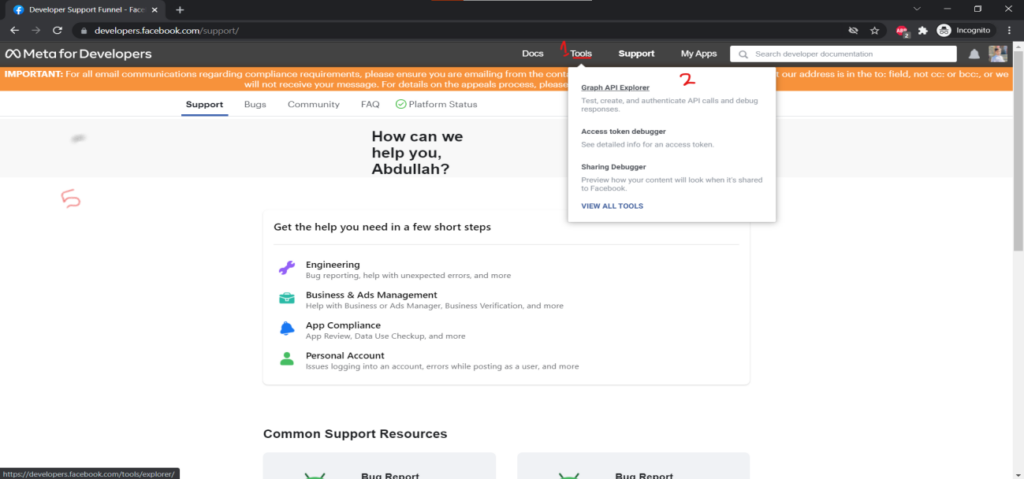
To access it, the user must have completed a simple step, navigate to the top menu bar and select tools> Graph API

An API is an interface to interact with a service. https://youtu.be/KLe2lCEy-Xw Explorer, “Facebook Graph API

An API is an interface to interact with a service. https://youtu.be/KLe2lCEy-Xw Explorer is a simple Facebook app that allows you to browse the JSONJavaScript Object Notation is abbreviated as JSON. JSON is programming language independent and compact. We use JSON code to format SharePoint online:Show search results mehr erfahren data provided by Facebook Graph API

An API is an interface to interact with a service. https://youtu.be/KLe2lCEy-Xw -requests are returned.”
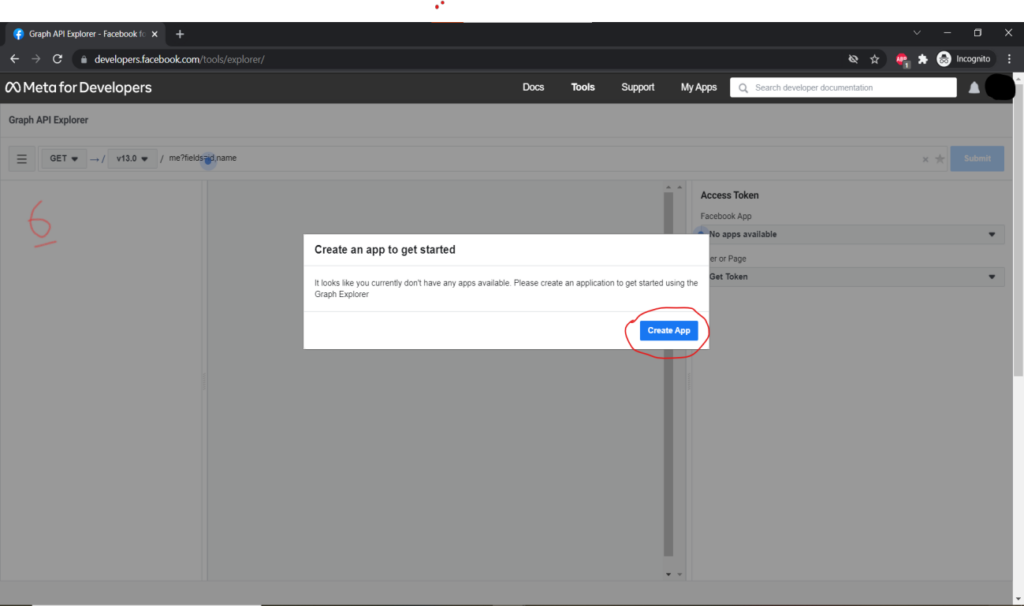
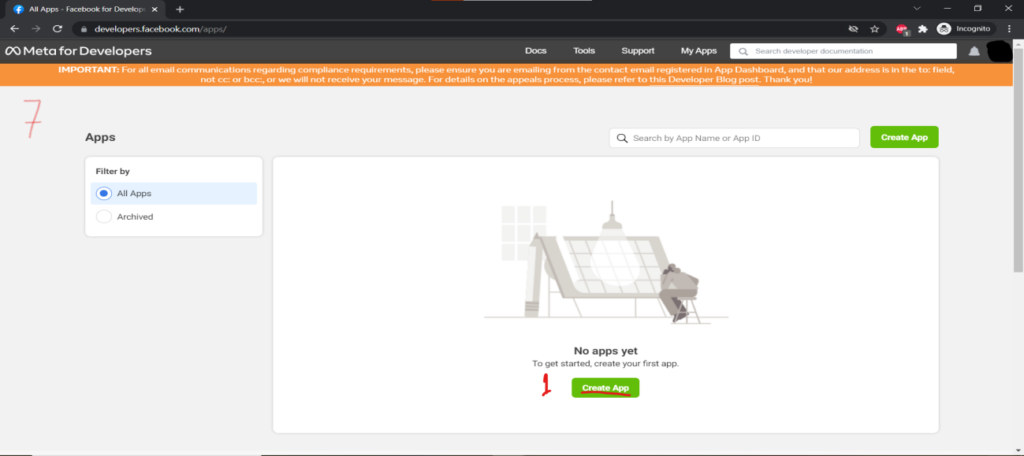

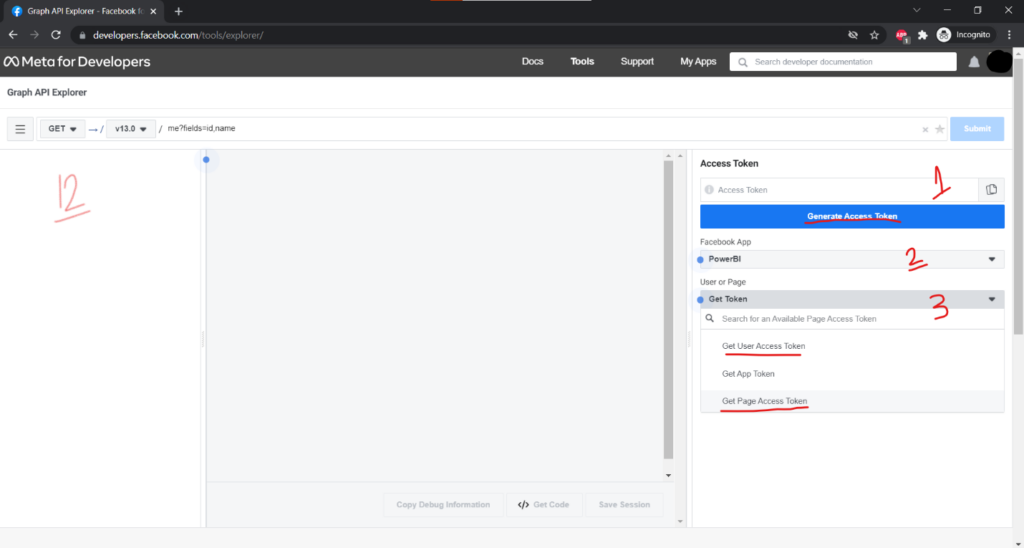
To access information for users (profile)
- Generate access token: When you click on Generate access token, a pop-up window opens
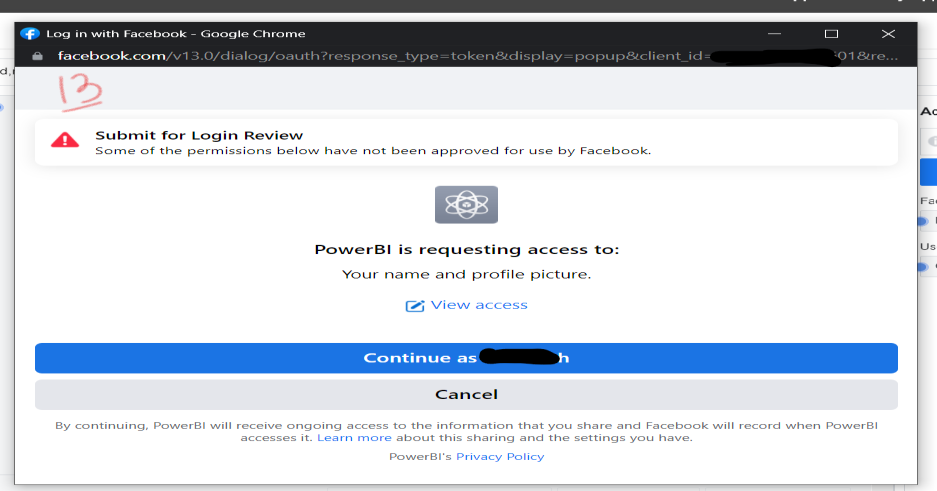
3 The next step is to select the authorization. If the user changes the authorization, the access token must be updated
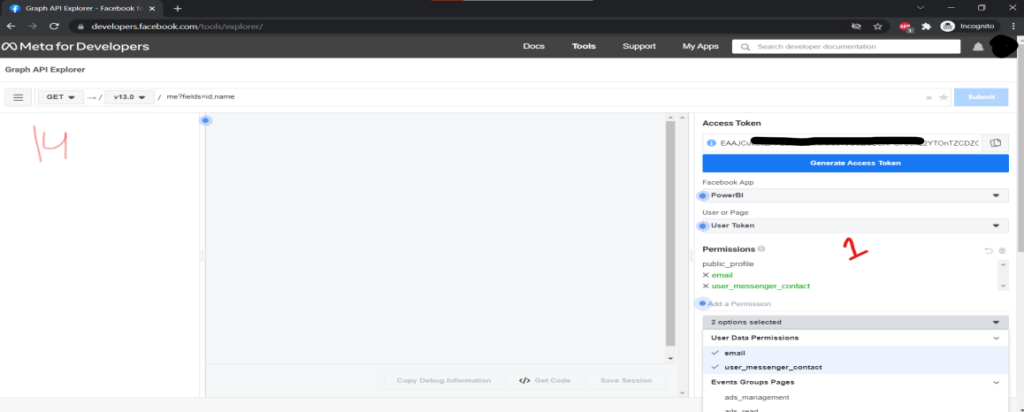
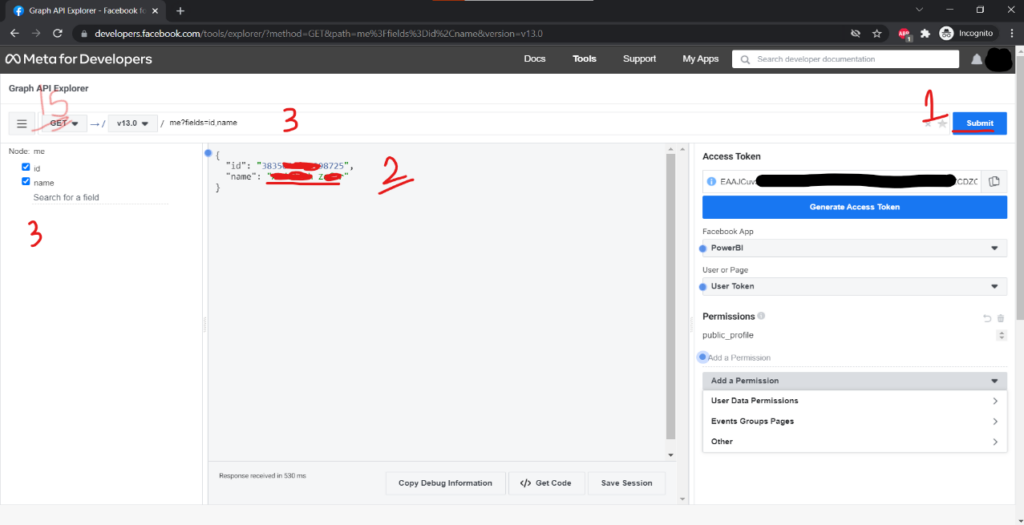
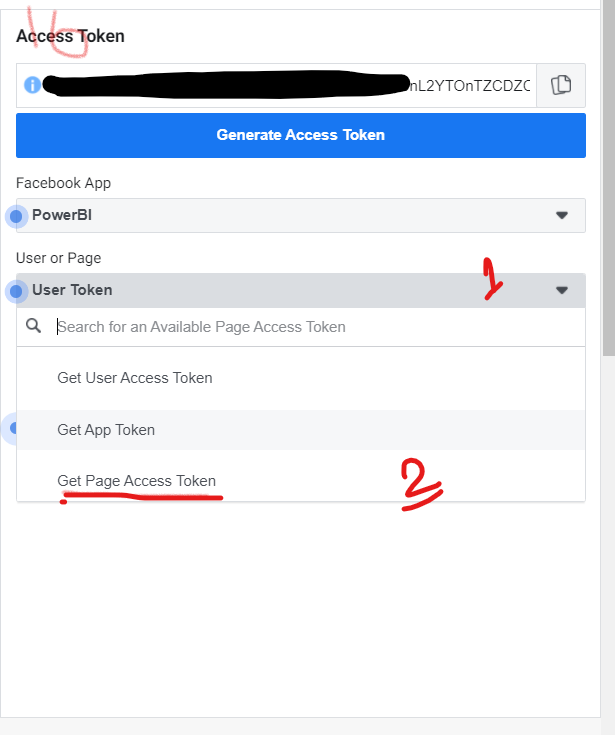
To access the information of the Facebook page, the user must follow the same steps as the user for the profile, he just has to select the page
- Click on the drop-down main menu and select “Get Page Access Token”.
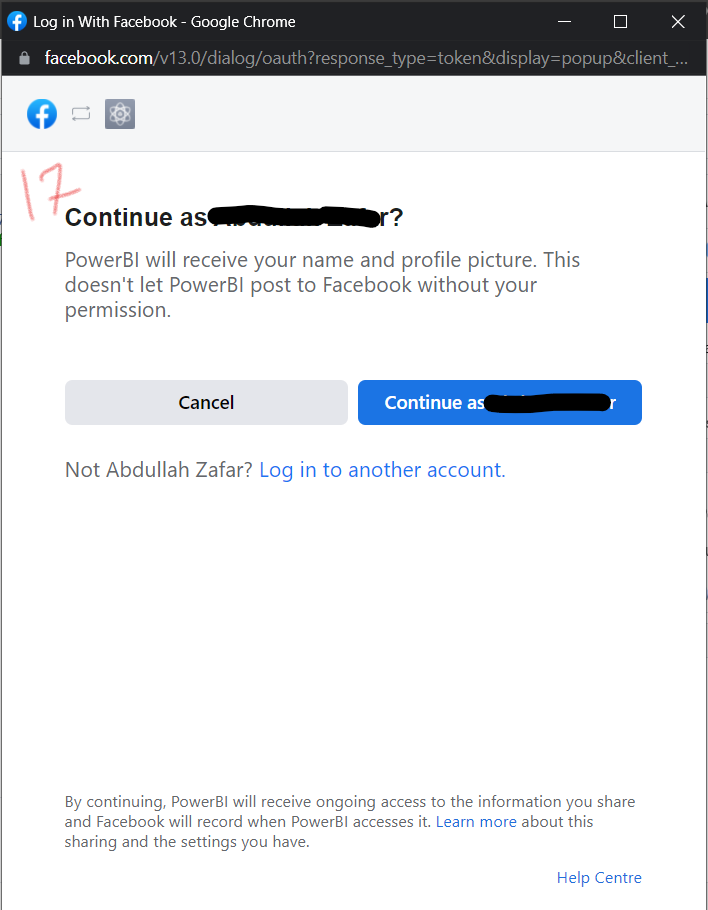
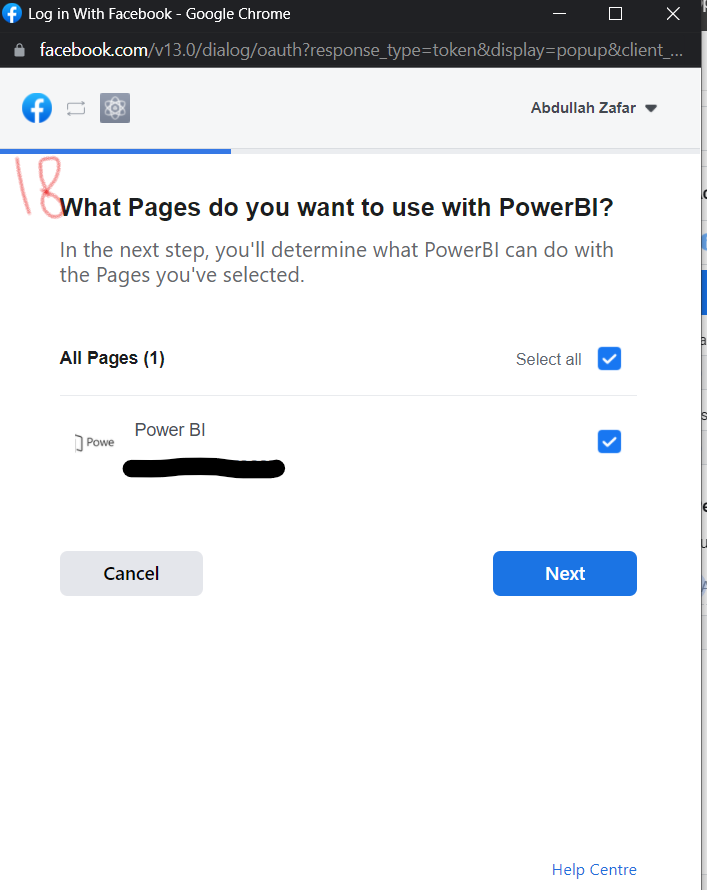
3. click on Continue as{Username} and a new window will appear. If you click on “Next”, the user will be redirected to a new pop-up window
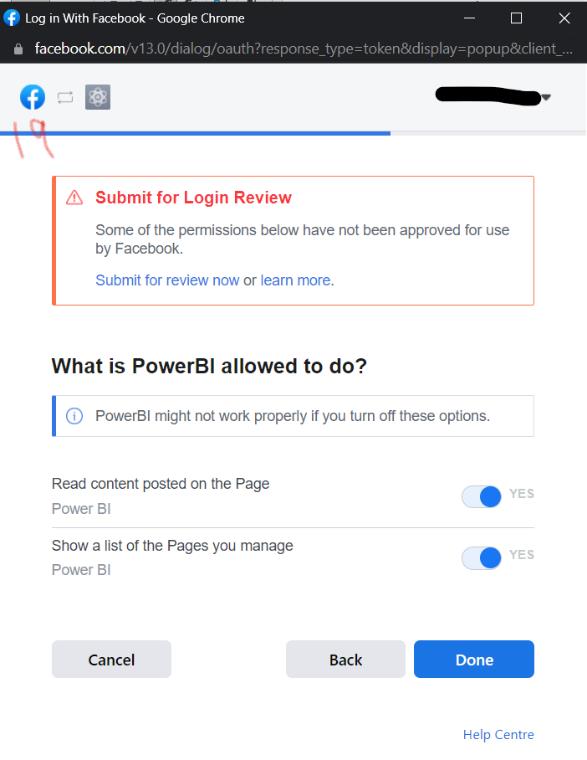
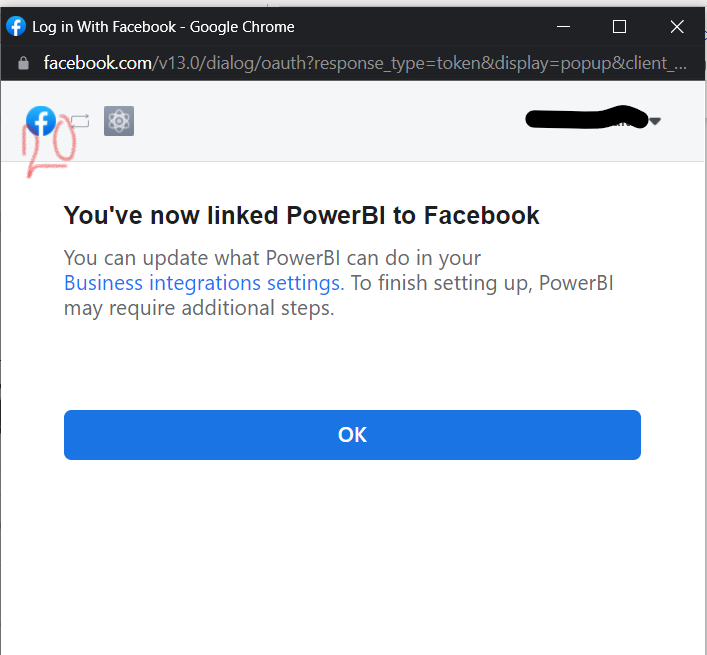
4. after clicking on “OK”, select “Generate token” and the page name for the menu, as shown in the picture
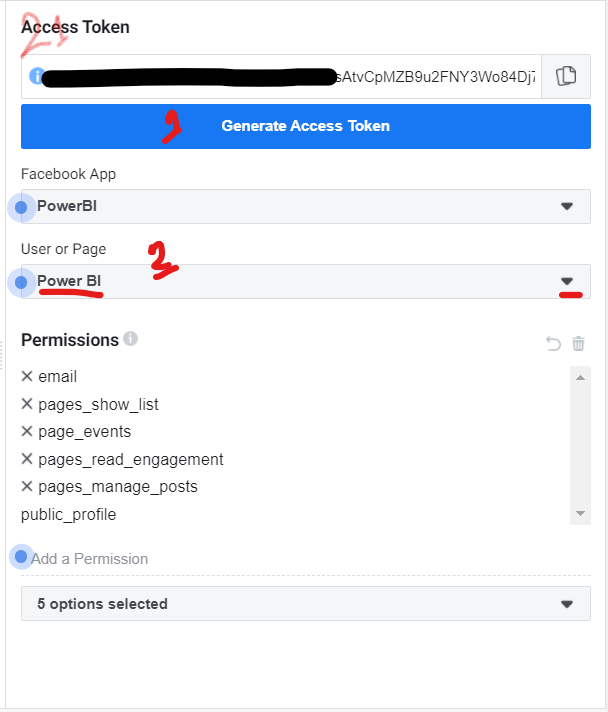
5. after completing this process, the user can access the page information, the user can enlarge or reduce the field according to the requirements, an example is shown in the attached snapshot
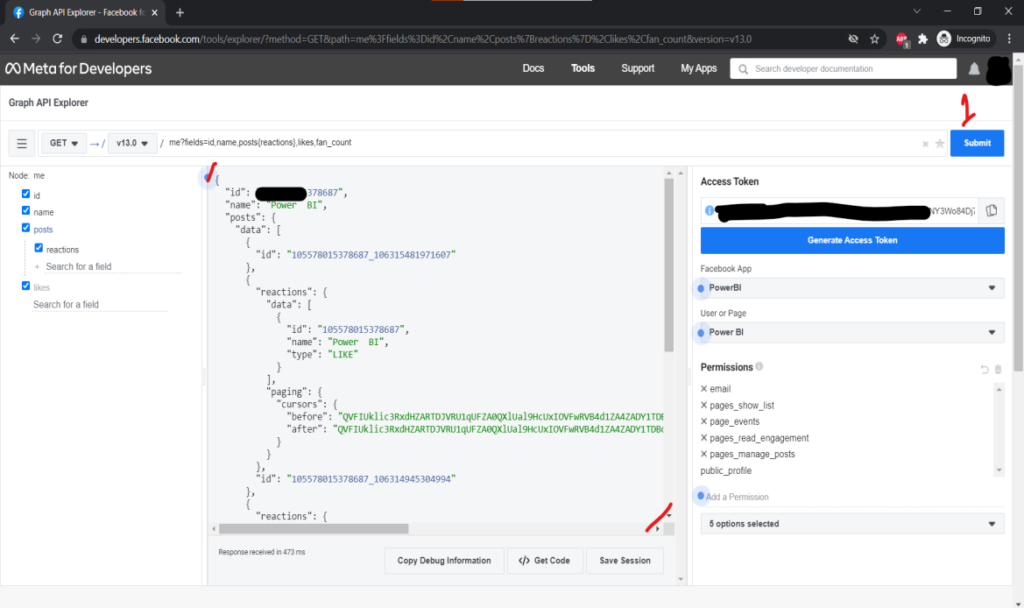
6. users can add and remove authorizations according to requirements and even switch back to the user profile. If a problem occurs, this is most likely due to the authorization set or the access token
Accessing the data in Power BI
The next part is the integration of Power BI

cURL is generated
To get the URLA Uniform Resource Locator identifies and locates a resource, for example a website, via the access method to be used and the location of the resource in computer networks., click on “ Get code ” in the menu bar at the bottom. The pop-up menu is displayed. Navigate to the last menu, i.e. “cURL”.
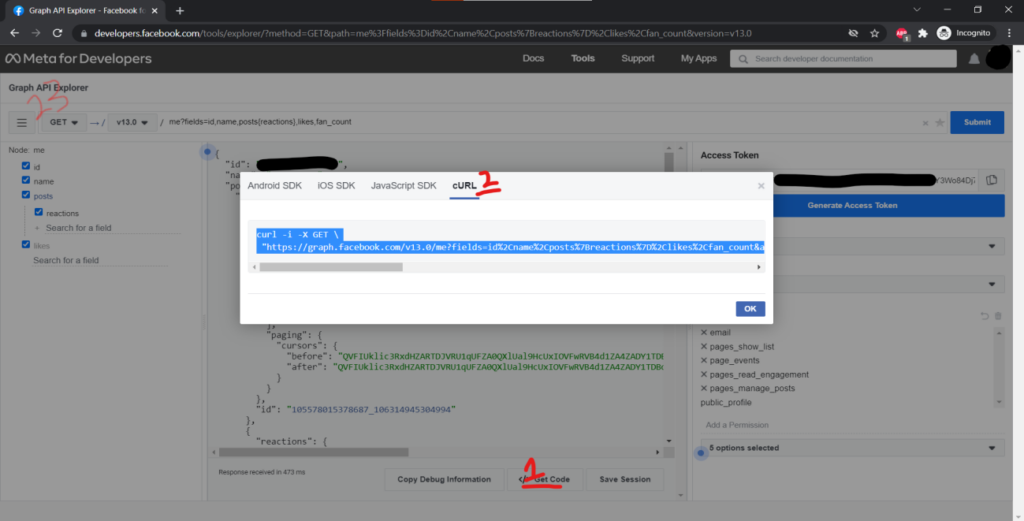
Copy the URLA Uniform Resource Locator identifies and locates a resource, for example a website, via the access method to be used and the location of the resource in computer networks. and cut off the leading character from this link to the “https” URLA Uniform Resource Locator identifies and locates a resource, for example a website, via the access method to be used and the location of the resource in computer networks. and also remove the character from the end. The URLA Uniform Resource Locator identifies and locates a resource, for example a website, via the access method to be used and the location of the resource in computer networks. can look like this
https://graph.facebook.com/v13.0/me?fields=id%2Cname%2Cposts%7Breactions%7D%2Clikes%2Cfan_count&access_token=EAAJCuvS8ZA7EBAICZCTsI8yelOcp5bWsAtvCpMZB9u2FNY3Wo84Dj7jmIuuCxUHtXzbrj36nw4qRXEEwrKLUtYT1ZBFDfX5KOEgjmQkz3kupxakPaekqoTQlgOF128s2gQsZD
The user can even test the URLA Uniform Resource Locator identifies and locates a resource, for example a website, via the access method to be used and the location of the resource in computer networks. by pasting it into the browser.

The user contains the access token. So if the user has changed the fields or the authorization, the URLA Uniform Resource Locator identifies and locates a resource, for example a website, via the access method to be used and the location of the resource in computer networks. is also changed. After adding the authorization, make sure that the URLA Uniform Resource Locator identifies and locates a resource, for example a website, via the access method to be used and the location of the resource in computer networks. is updated. Since we have a valid URLA Uniform Resource Locator identifies and locates a resource, for example a website, via the access method to be used and the location of the resource in computer networks., the next step is to access the data in Power BI
Connecting PowerBI Desktop
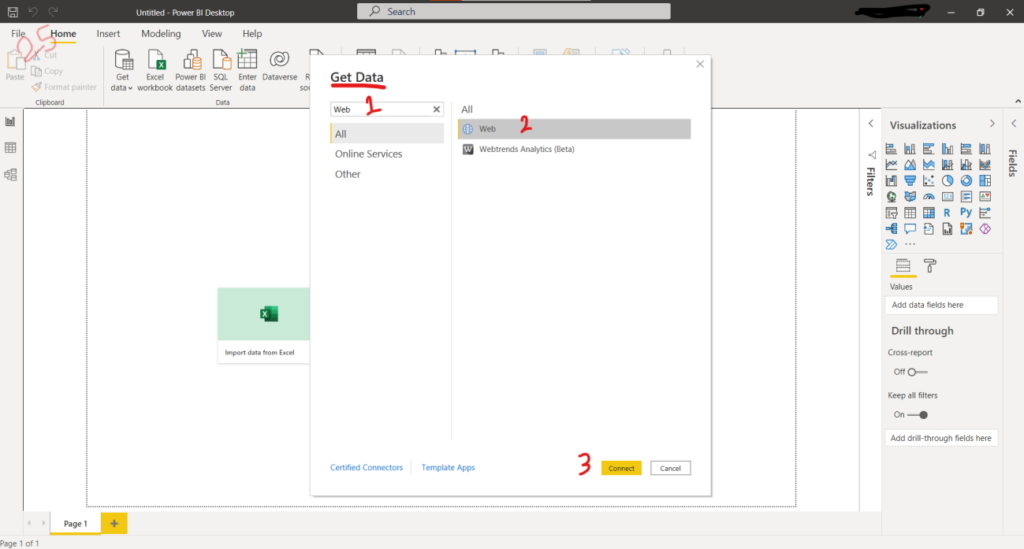
Open PowerBI Desktop and navigate in the pop-up search for “Web” to “Retrieve data” and click on “Connect”.
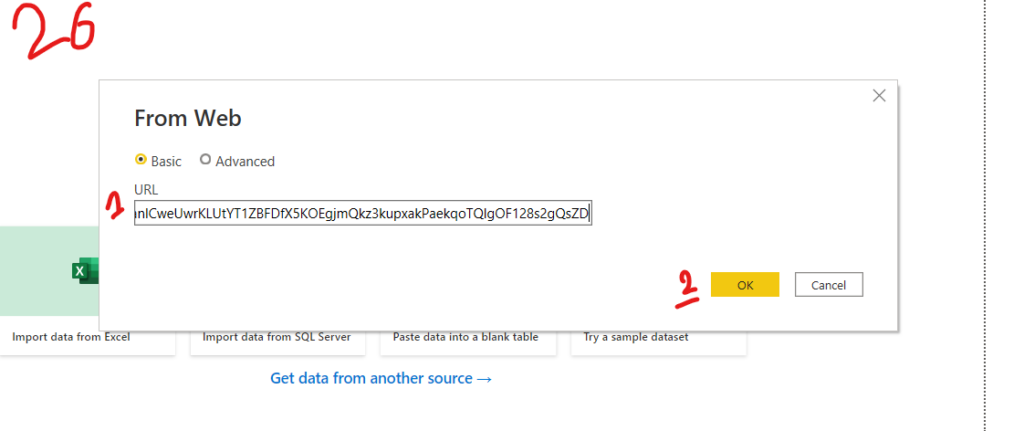
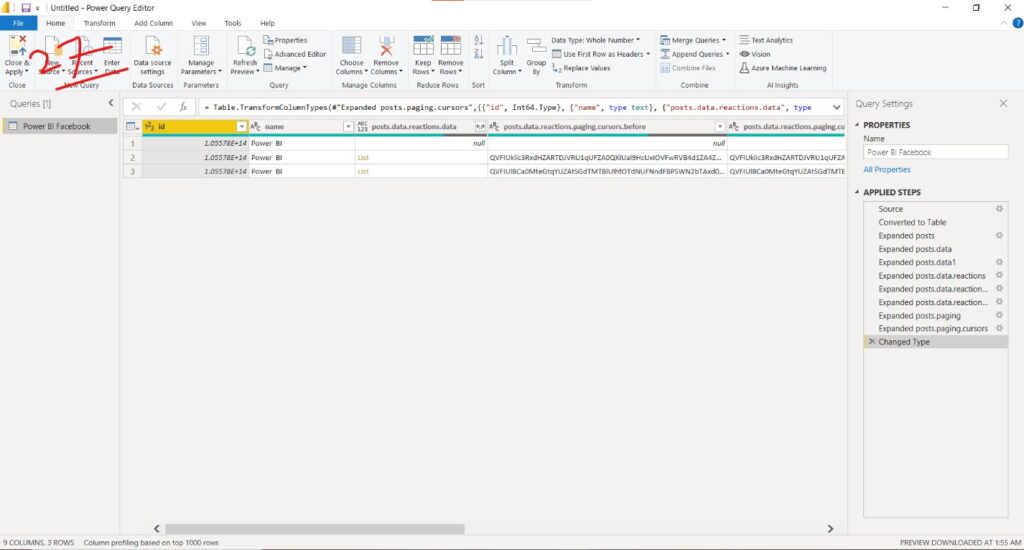
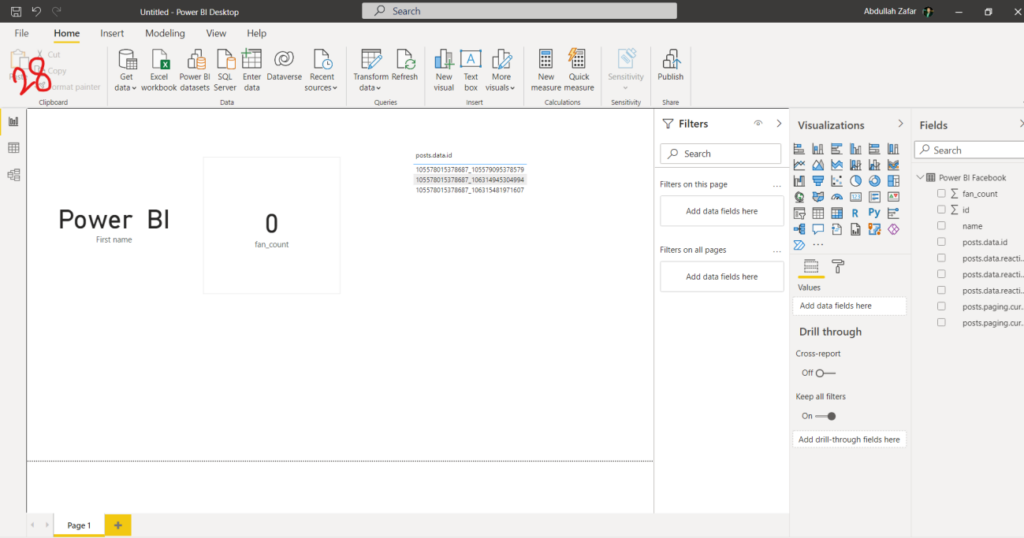
A pop-up menu appears, enter the URLA Uniform Resource Locator identifies and locates a resource, for example a website, via the access method to be used and the location of the resource in computer networks. and click on “OK”. You do not need to seek an advance as the access key is appended to the URLA Uniform Resource Locator identifies and locates a resource, for example a website, via the access method to be used and the location of the resource in computer networks. so that anyone with that URLA Uniform Resource Locator identifies and locates a resource, for example a website, via the access method to be used and the location of the resource in computer networks. has access to user data, so the URLA Uniform Resource Locator identifies and locates a resource, for example a website, via the access method to be used and the location of the resource in computer networks. must be kept confidential
Dieser Beitrag ist auch verfügbar auf:
![]() Deutsch (German)
Deutsch (German)
