
Have you ever had the task of repeatedly explaining to a team member or a valued customer how to use certain things online or perform specific actions? These repetitive explanations can not only be frustrating, but also time-consuming and tiring.
For this very reason, it is extremely important to create clear instructions in order to sustainably increase the productivity of any company. Similar to the instructions with screenshots on noprob.it, you can easily create automated instructions with Scribe without having to take screenshots manually. In this article, we’ll take you step-by-step through the process of how you can use Scribe to create easy-to-understand instructions online and optimize workflows.
Instructions for using Scribe
1. logging in and adding the Scribe extension
To access the Scribe website, you can click here click here. Log in there either with your e-mail or with your Google account.

After logging in, you will need to download an extension for Google Chrome.

After adding the extension, you should see it in the top right-hand corner of the browser. If not, click on the puzzle icon and attach the extension to the bar.


2. screen recording
After clicking on the extension, this window opens. If you now click on “Start Capture”, the recording of your screen will start automatically.

If you are on a website that Scribe cannot capture, you will see this message.

If this is the case, open a new tab and the recording will start automatically from here.

You can tell that the recording is running when this symbol is displayed in the bottom left-hand corner. Everything that is clicked or typed from this point on is recorded by Scribe.

3. editing the scribe
Once you have finished recording, click on the icon in the bottom left corner again to stop recording. A new tab is then opened and the previously recorded sequence is displayed as a guide. As a demonstration, we have recorded the process of translating a Wikipedia article with Google Translate.

The tool does not always capture every step perfectly and the automatically generated texts are written in English, but can be manually rewritten in other languages. This is easily done by clicking directly on the text.

If a step is incorrect or not relevant, it can easily be deleted using the three dots.


If a step is missing, you can of course add it. You can also add tips, warnings, additional recordings and GIFs.

In this example, we have added a tip at the end of the instructions.

4. export the instructions
Once you have adapted the instructions and are satisfied with the result, click on “Done Editing”. There are several options for exporting and forwarding the instructions. Click on “Share” to do this.

4.1 Forwarding
The created instructions can be sent by e-mail in the “People” area. Click on “Copy Link” to forward the URLA Uniform Resource Locator identifies and locates a resource, for example a website, via the access method to be used and the location of the resource in computer networks. to the created scribe as required.

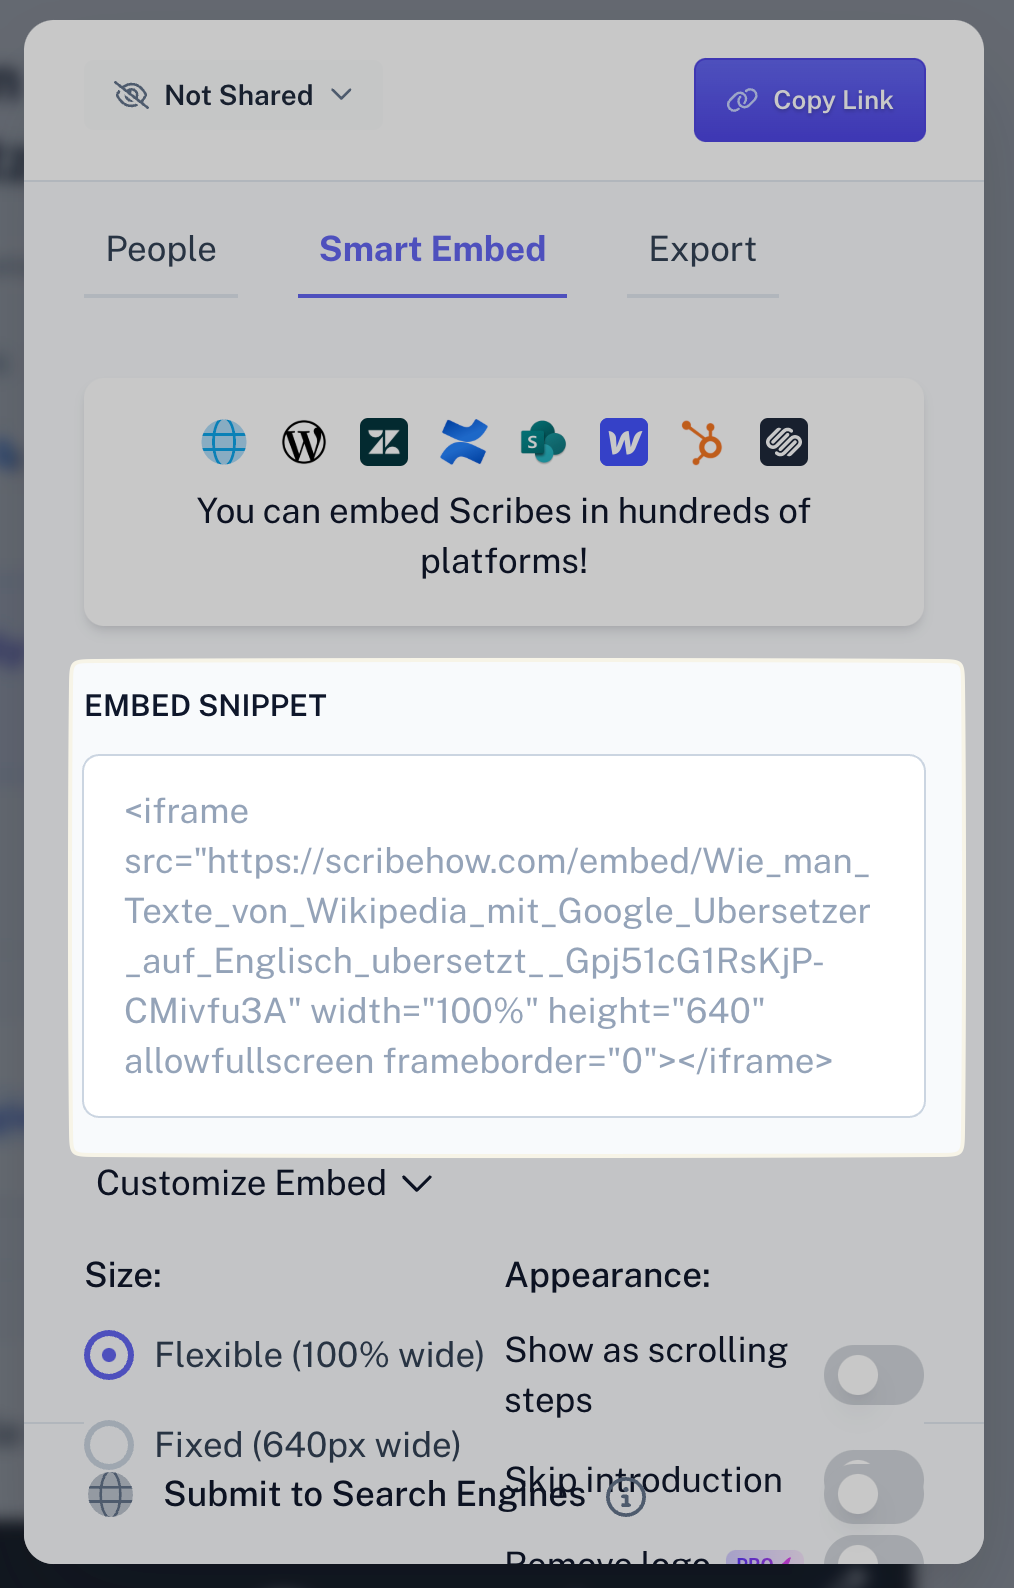
4.2 Embedding in other websites
In the “Smart Embed” area, the created instructions can be embedded as a snippet on various platforms. The snippet simply needs to be copied and pasted in the right place.

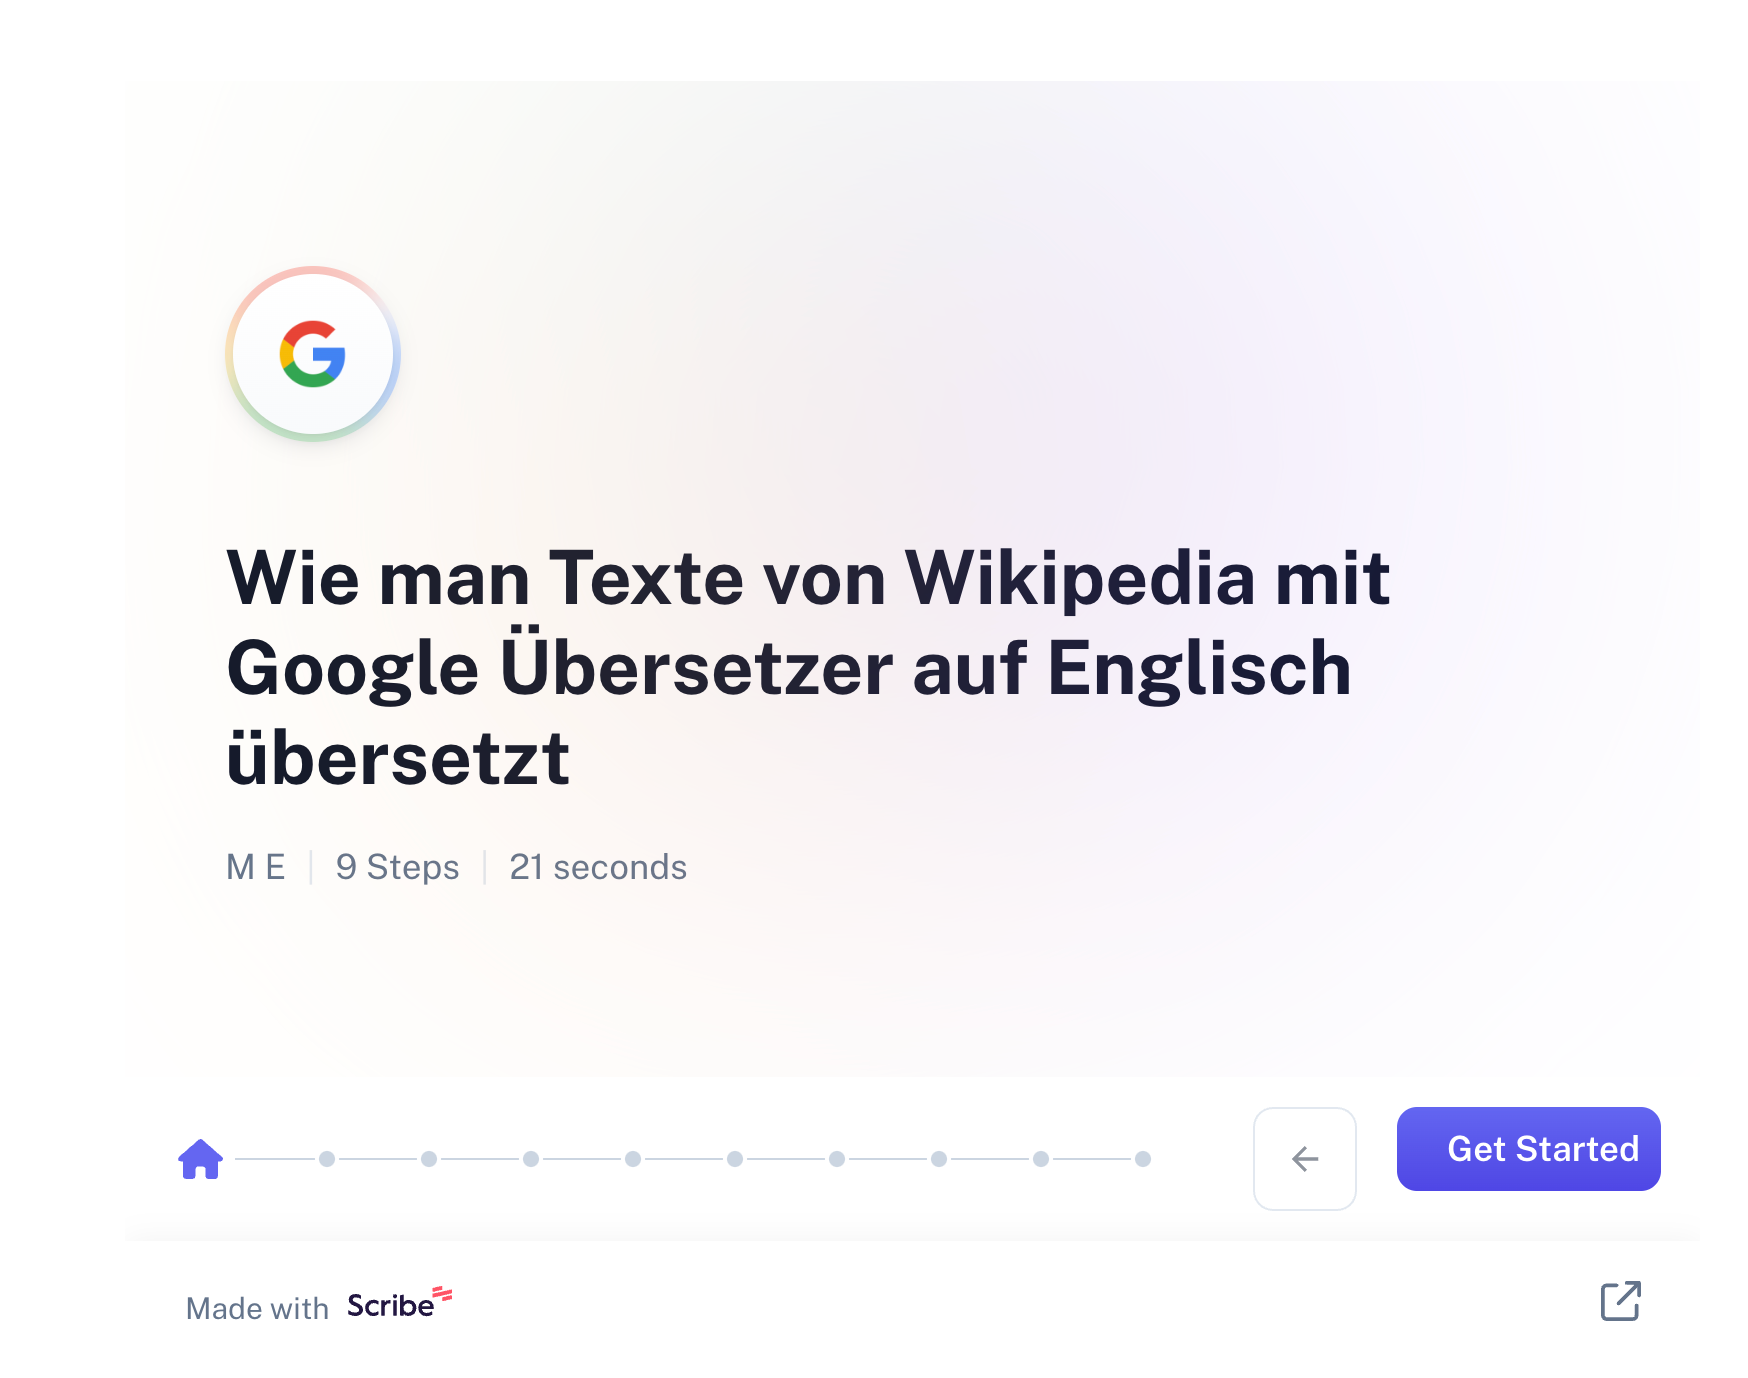
This is very simple in WordPress

This is what the inserted instructions look like on a WordPress

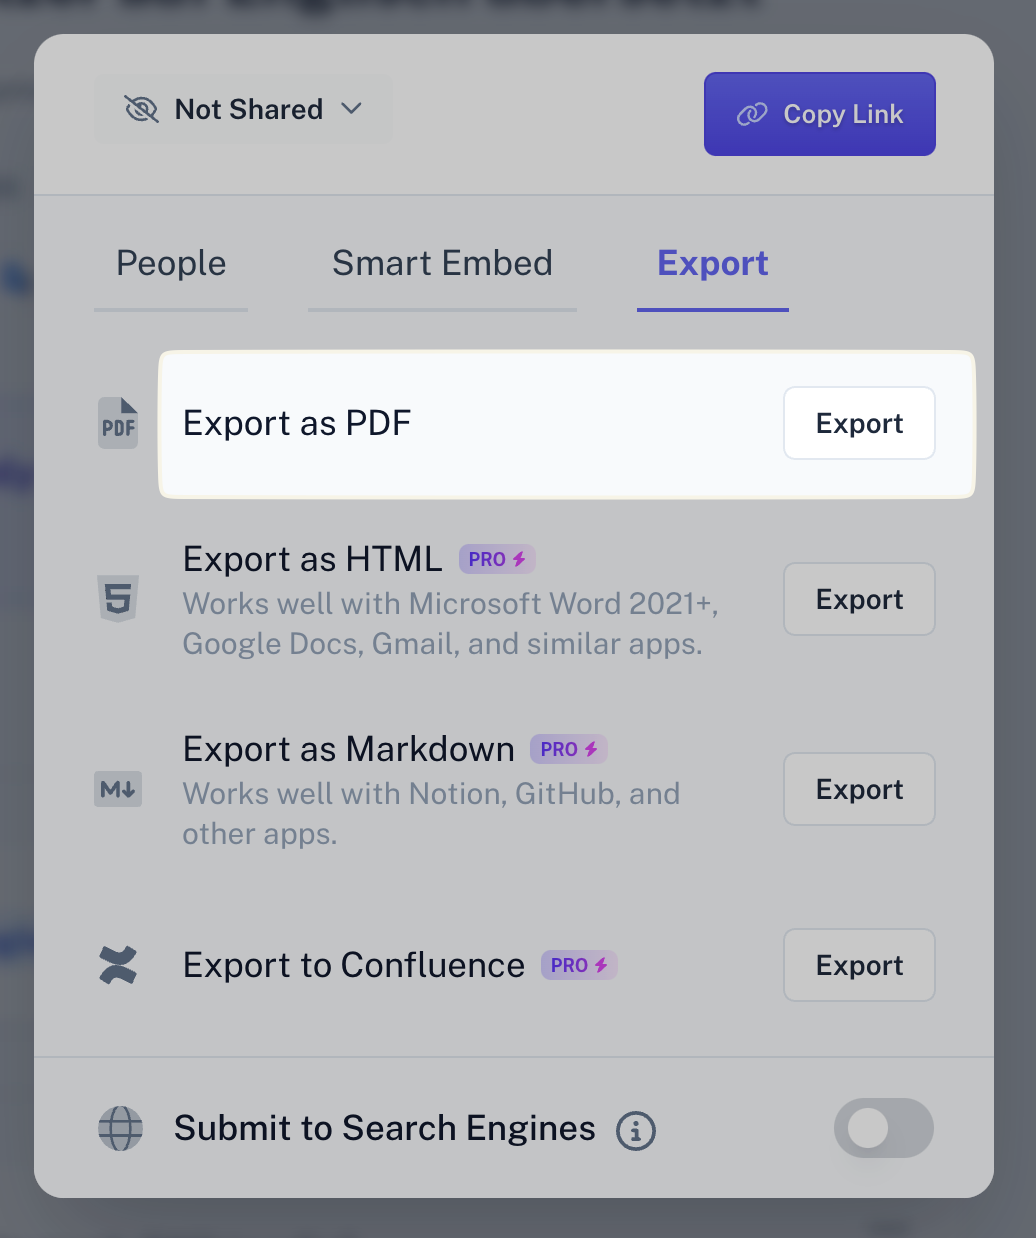
4.3 Export instructions
There are many options for exporting the instructions under “Export”. However, only PDF

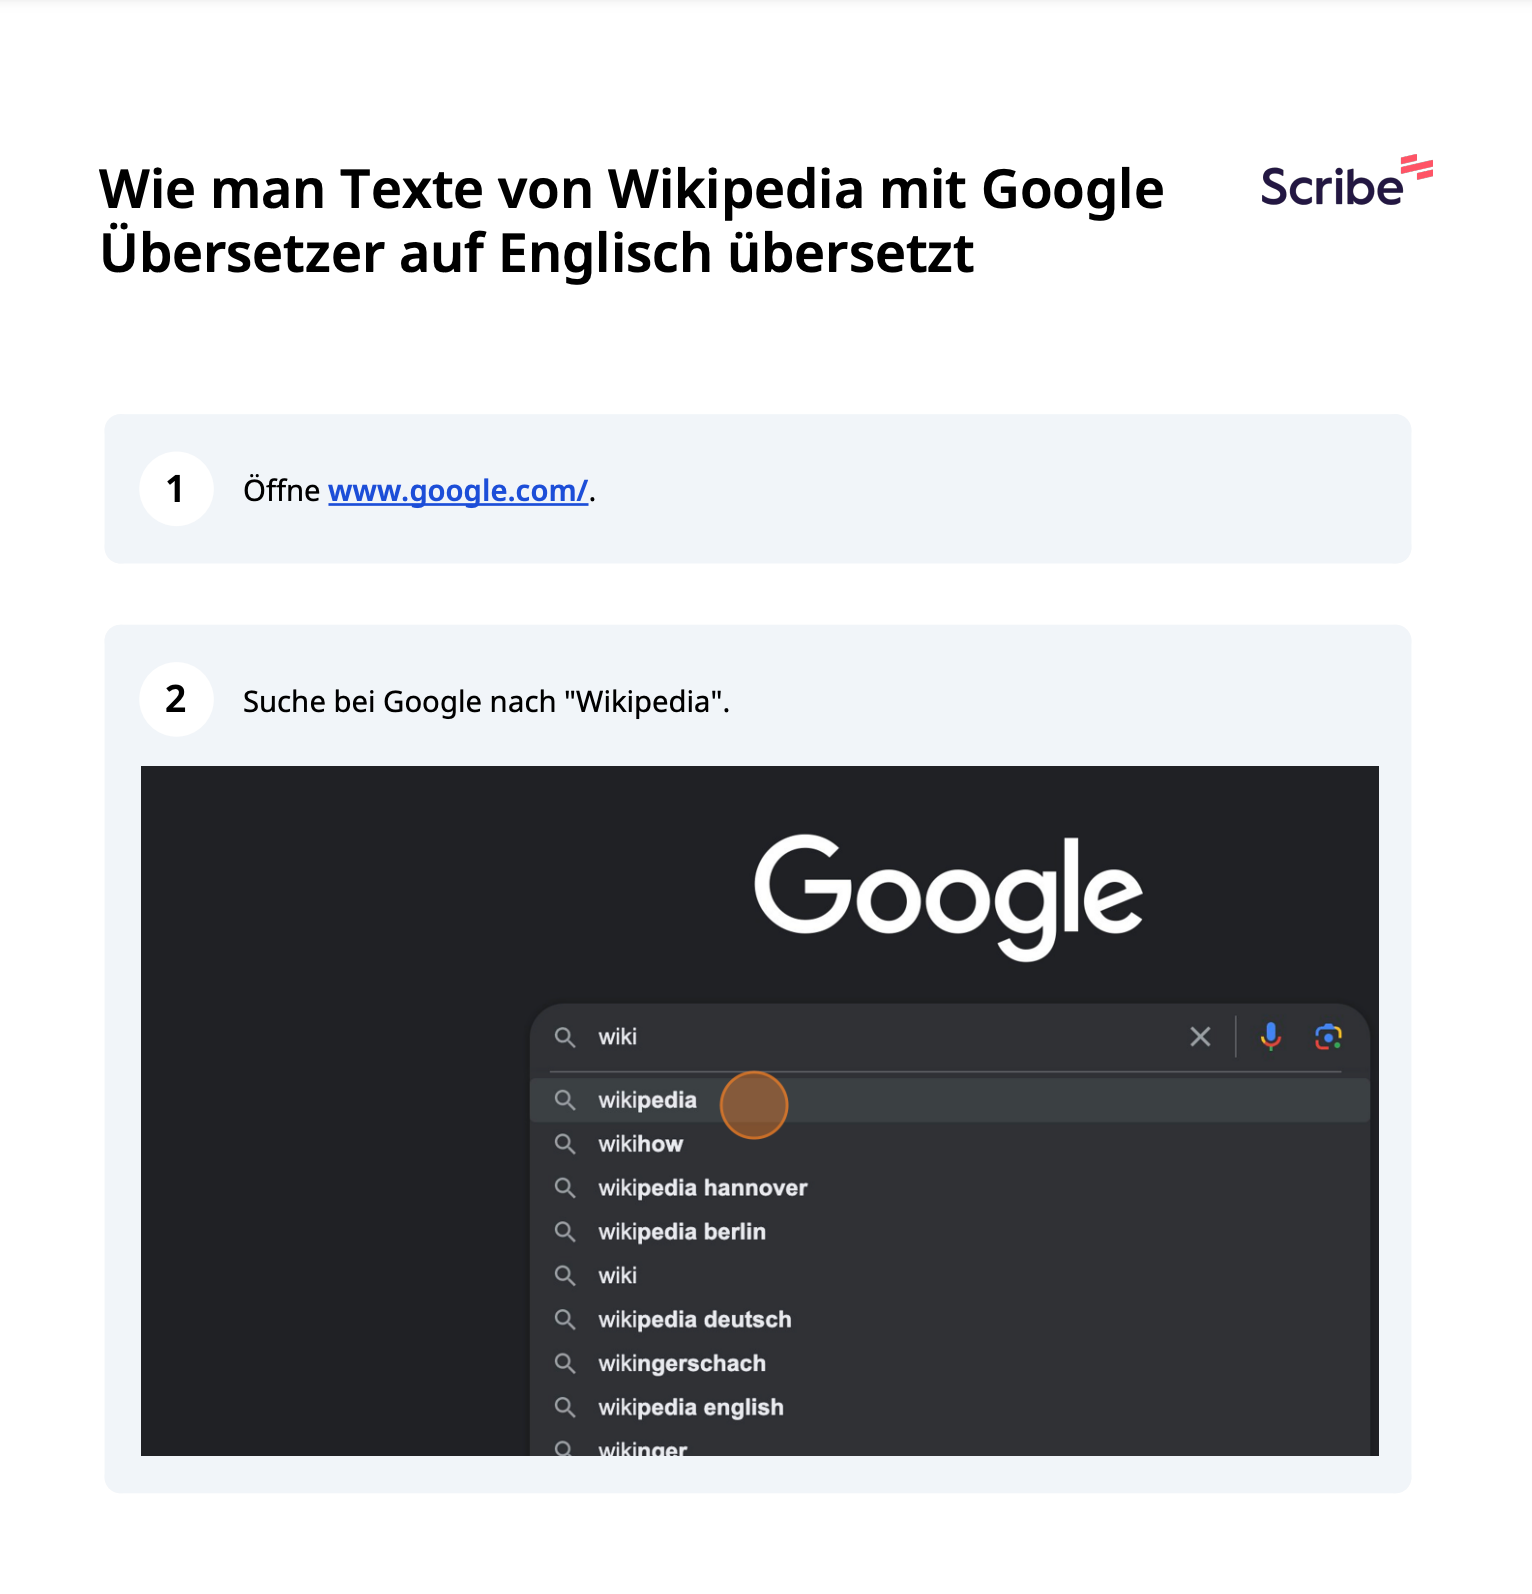
For our example, the first page of the instructions is then displayed as a PDF

Conclusion
Even the free version of the Scribe tool makes it easy to create visually appealing and structured instructions that are easy to understand and can be shared with others in various ways. The recorded steps may not be perfectly described and are currently only available in English, but they are extremely helpful and, above all, time-saving when creating step-by-step instructions.
Try it out for yourself and see for yourself the many possibilities of Scribe. If you would like to delve
Dieser Beitrag ist auch verfügbar auf:
![]() Deutsch (German)
Deutsch (German)

 Skip to content